
If anyone knows Ally Best, they know that she's a bit of a slacker at times. Let's be real. If you don't believe me, get ready to see a post that should have been up 11 months ago.
Yeah, go figure.
Anywho...
I thought I'd share with you one of the things
I marked off my "Become A Domestic Woman" List!

This was my project this summer.
I knew I would need a desk of my own in my new apartment,
so I decided to refurnish my own rather than buy
some other boring brown thing. ;)
This is my first ever tutorial:
How to make THIS type of furniture
with your key element: MODPODGE.
I first thought of this idea about 3 years ago.
My young women's leader was about to have a baby,
and she re-did the drawers of an old dresser for the nursery
by doing exactly what I did to my desk.
Here's what you'll need:
-a piece of furniture to redo
{I got my desk at D.I. for $25}
-1 quart of latex acryillic paint of your choice
{I used antique white}
-paper you want to be on your drawers
-mod podge
-paint brushes
-measuring tape
-sander
-wax paper
-popsicle stick or something to smooth your surface
-ink pad for the brown around the edge
{found at any craft store}
........
Step 1: Sand that baby

If you want a work out for your upper arms while accomplishing something,
sand a desk.
Oh my.
When I got the desk...
let's just say it had a terrible paint job.
There was dripping-it didn't have an even surface...
just bad.
I sanded it down until it was smooth
and all the bumps were gone.
This did mean some parts were completely free of paint,
but that's perfectly fine
because you're just going to be re-painting it again anyway. :)

This is what it looked like after the sanding.
I let the desk sit for a few days
{mainly from my weakness to leave my projects and come back to them}
and got started on the paper to go on the drawers.
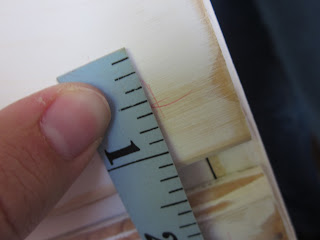
In order to make to arrange the paper on the drawers,
I measured the area I wanted to put paper on.
I wanted to leave a white border around the paper.
In order to make to arrange the paper on the drawers,
I measured the area I wanted to put paper on.
I wanted to leave a white border around the paper.

I went in about half and inch on all sides.
I took those measurements and created card-stock
rectangles and squares that matched the same area.
With that, I started gluing on paper.

This was the paper I had selected.

The picture looks like the paper is smooth,
but it really wasn't.
Then I got to the MODPODGE.
With this section, I worked fast.
It's not detrimintal if you mess up in the rush
because it's modpodge and very fixable.
Just add another layer.
There were certain sections I added more paper on
at the very end because I didn't like how I arranged it.
So.
With your card-stock, filled with bits of paper squares,
use a sponge brush and brush it on.


The paper did get bubbly....

So I smoothed it out with the side of a popscicle stick.

It wasn't exactly perfect, but got rid of the majority of the bubbles.

I then let the paper dry for a bit,
then placed it in between 2 sheets of wax paper.
You want to make sure the paper is dry enough not to be
too sticky, or else it will stick to the wax paper
and rip part of your pretty paper.
Believe me.
Then I placed a nice tower of books on top. :)

Yes, lovely, I know.
I did this to flatten and smooth out the paper.
I would check it every now and then,
but it took about an hour or more to get the
flatness I wanted.
It came out looking like this!

Very nice. :)
The paper should be pretty stiff.
I then brushed/wiped the edges with my
brown ink pad.
Since I can't do one section of a project at once,
{Yeah, yeah, I know}
I painted the dresser and handles in the mean time
while stuff was drying and being pounded by a pile of books.
The handles look like this after sanding...

and that wasn't going to do.
So I unscrewed them from the drawer,
repainted them in the paint I used for the dresser,
and finished the edge with a brown ink pad.
I'll show this in the finished product.


I painted about 3-4 coats on all the drawers
and the rest of the desk.

{Some moments,
it was grueling but I loved it.}
Next,
I took my newly flattened pieces of paper
composed of ripped paper,
and glued them onto the drawers
by putting modpodge on the back of them.
It stuck pretty well.
Then I modpodged the whole drawer
with the paper on it to seal the deal.
After that, I got my handy dandy ink pad,
then brushed/wiped it on the edges of the drawers

and edges of the desk.
And folks,
the finished project.


I simply adore it.
I knew I would only use it for a year at school
{because Chad was coming home, and let's be honest,
I knew marriage was pretty much happening this summer ;)},
but I considered I could have it in my room during the summer,
then use it in my little girl's room in the future.
So?
Definitely worth it.
I've discovered I'm not THE BEST at tutorials,
so if there arises any questions from any reader
or simply the universe because you never actually know
who ACTUALLY reads your blog,
just send me a message or leave a comment and I would
love to explain anything in more detail!
Biggest advice?
BE PATIENT.
I had to redo and redo certain parts of the desk to get
what I wanted, and I was really frustrated at times.
But it was worth it.
Plus I love redoing furniture so.....
:)
Enjoy.
Here's to many redoing of furnituring in the futuring!
LOVE. LOVE A LOT.
AB future J


No comments:
Post a Comment